
Hi everyone,
If you ever had the chance to skim through my work, you may notice I have a lot of glowing stars and moons. I’ve had a student ask me about this at one of my workshops, and would like to post a small guide to how I make them glow :)
Once again, I will be working in pencil to show you my process. That way, you can apply your own style to the guide.
- Note: I use Photoshop (PS) on my MacBook, so my shortcuts may be a little different if you use a PC.
- Note: This guide will assume you have a basic grasp using PS (especially your ‘Layers’), and also know a little bit about making basic gifs using ‘Timeline’ . Otherwise, do feel free to go through my previous ‘Moon Field Guide’, where I make a gif via ‘Timeline’ and talk about ‘Layers’.
1. Making a Plan
Glows are quite simple.
There are a lot of ways to create a glow, and based on what you’re most comfortable with there is no wrong or right method as long as you achieve your desired effect. For me, it involves playing with the ‘Opacity’ of the Glow in your ‘Layers’ (go to ‘Window’ ︎︎︎ ‘Layers’ if your Layers column isn’t showing up).
Before I start animating, I always make a plan of how my glow will transition.
In the image above, you can see 8 pencil Moons which indicate the amount of frames I plan to use for the animation (before it makes a loop back). Each Moon has varying shaded tones around it to show a Glow. I also make notes of the Glow’s opacity in %, with the darkest opacity at 50% and lightest 15%.
So essentially, my plan shows the Glow of the Moon to start at an opacity of 50% ︎︎︎ 15% in 8 frames (5% increments), then loop back from 15% ︎︎︎ 50% .
2. Organising your Layers
To begin, you’ll need images of two separate elements:
- what you’ll like to make glow (for me a crescent Moon)
- the Glow (I shaded it using pencil)
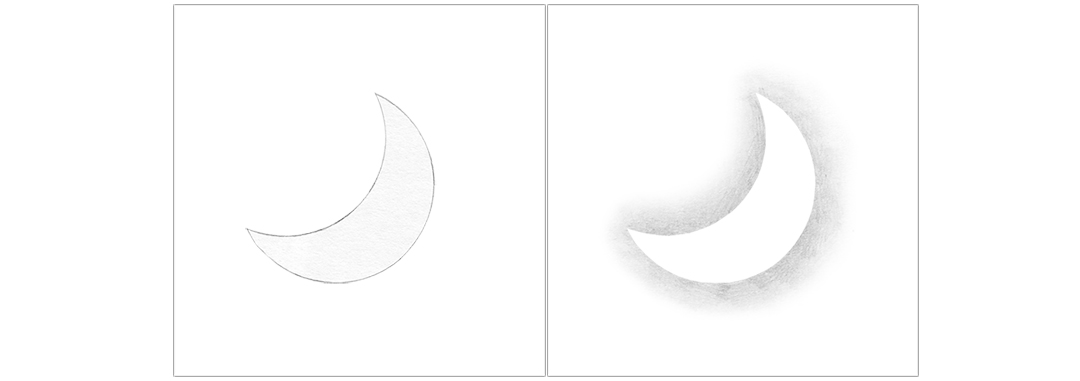
Make sure these elements stand on their own, and are not attached to a solid background. I converted each image into a PNG with a transparent background.
When we bring them into a new file on PS, we will need to layer them separately.
Depending on your desired aesthetic, the Glow can be at the front or back. In this guide, my Glow will be behind my Moon.
Above: Showing the Moon and Glow as PNGs with a transparent background.
Above: Moon and Glow layered in a PS file.
3. Let’s Animate
To animate I use the ‘Timeline’ tool in PS (go to ‘Window’ ︎︎︎ ‘Timeline’, and a horizontal bar will pop up, then click ‘Create Frame Animation’). Set your ‘Frame Rate’ (I used 0.2), and keep your Timeline looped by selecting ‘Forever’.
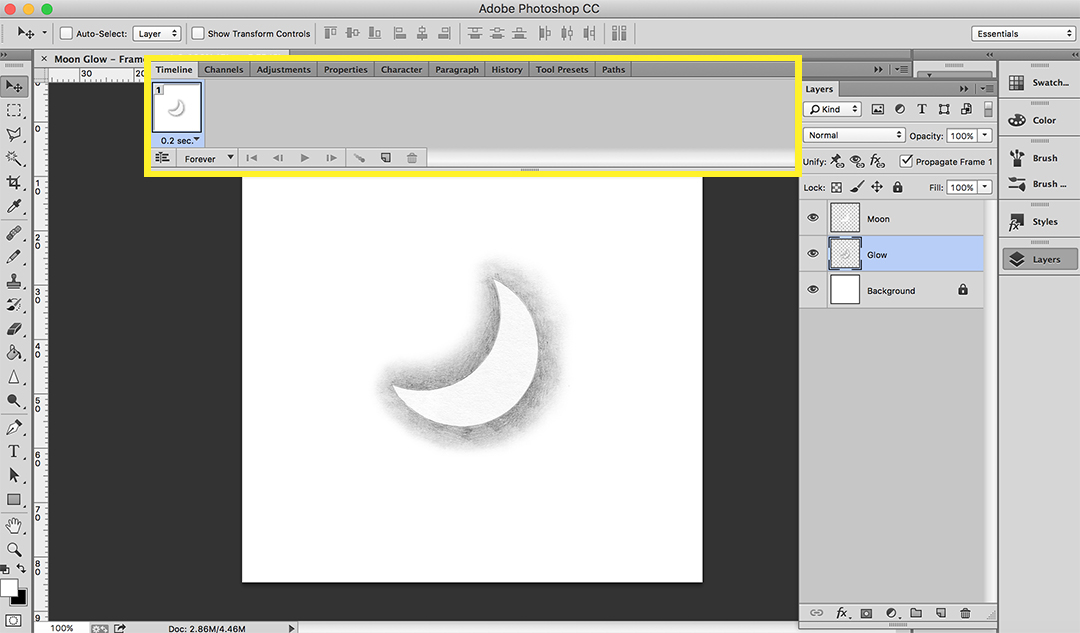
Above: Timeline specs setup in yellow box.
4. Playing with Opacity
My plan is to set the Glow’s darkest opacity at 50% and lightest 15%.
Ideally, I’ll planned for 8 frames to make one animated transition before making a loop back to 50%. The Glow of the animation will start from 50% ︎︎︎ 15% in 8 frames at 5% increments, and then back to 50%.
In the yellow boxes of image below, the ‘Opacity’ of the Glow is set at 100%.
Due to past experience, this is far too dark for my liking and I have anticipated to have it set around 50%.
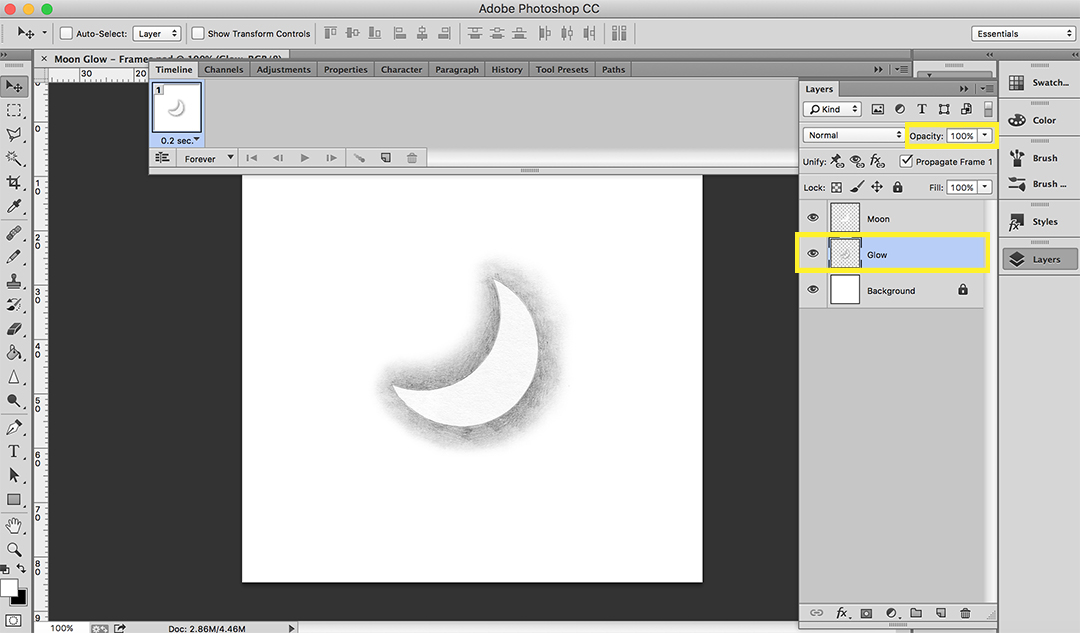
However if this is your first time, feel free to play around with the ‘Opacity’.
I had made a small gif below to show you what happens when I change the opacity of the Glow to different %’s.
Above: Showing the Glow at different percentages of opacity.
5. Animating Opacity
To revise, our plan is: 50% ︎︎︎ 15% ︎︎︎ 50%.
It will roughly take 8 frames to make one transition, before looping back in another 8 frames. So our gif will be roughly 16 frames in total.
In the gif below, I’ve set my glow to 50% in my ‘Layers’. This will also appear in the first frame of my ‘Timeline’.
We are now going to create a second frame in the ‘Timeline’, and while on our second frame go back to the Glow in ‘Layers’ and change the opacity to 15%.
We now have two frames in our ‘Timeline’ where the Glow is set to 50% in frame 1 and 15% in frame 2.
If we were to play these two frames in our ‘Timeline’ (gif below), we can see the opacity of the Glow makes a quick jump from 50% to 15%. We can ease this transition by adding frames in between. To do that we ‘Tween’.
6. Tweening
Tweening in PS allows us to generate frames between two selected frames.
Tweening is convenient but has its limitations. For eg. I mostly work with hand drawn frames, and Tweening is unable fill in the gaps between a movement that is unique in every frame. Rather, I feel it’s great for getting a consistent transition in opacity or moving an element from point A to B.
Below ‘Tween’ is highlighted in yellow.
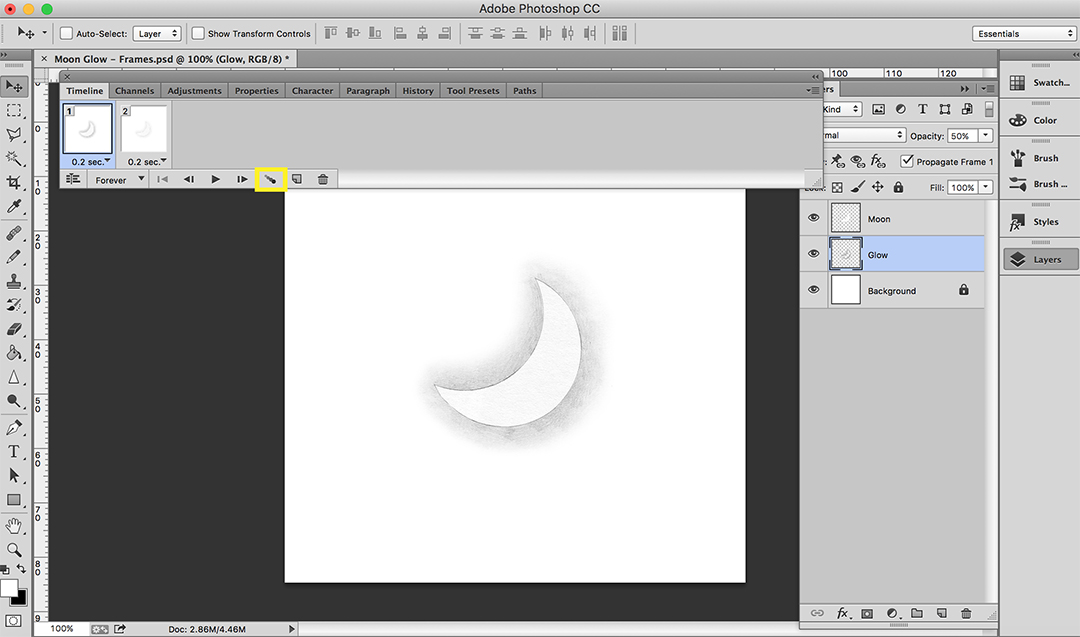
To Tween our transition we need to select both frames in the ‘Timeline’.
To select both, click on Frame 1 (it will be highlighted), then select the second frame at the same time by holding ‘Shift + left click’.
Both frames will now be highlighted indicating you have selected both frames at the same time.
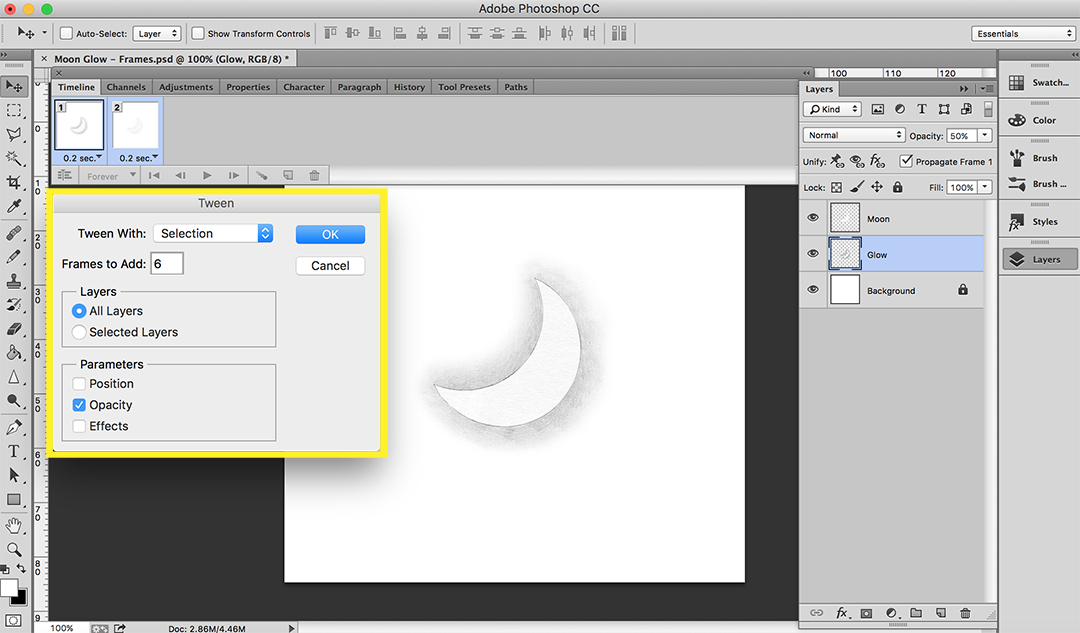
When we click ‘Tween’, a small window will pop up with a list of specs (see yellow box in pic below).
From top to bottom:
- Tween With: Selection (your selected frames in ‘Timeline’)
-
Frames to Add: 6. I am adding 6 frames in between Frame 1 and 2 which will add up to my planned 8 frames in total for one transition.
-
Layers: All Layers. This part is indicative of the layers in your ‘Layers’ column. We need all layers, ie. Moon and Glow, for this animation to work.
- Parameters: Opacity
Click ‘OK’.
You’ll see that 6 new frames have popped up between selected Frames 1 and 2 (now Frame 8).
And when you play the animation…
Tada!
To make a full loop, we simply ‘Tween’ once more. After Frame 8, we add a new frame (Frame 9). Make sure Frame 9 is highlighted in our ‘Timeline’ as this shows we are currently sitting on this frame.
Move to our Glow in our ‘Layers’ and change the ‘Opacity’ to 50%. Frame 8 is at 15% and Frame 9, 50%.
Go back to your ‘Timeline’, select Frame 8 and 9 and ’Tween’. The settings are saved to our previous specs, and this should create a set of frames that allow Frame 8 to transition into Frame 9.
And now we have a glowing moon!
Note
You may notice the loop from Frame 16 back to Frame 1 are both at 50% opacity.
This means the animation sits at the same opacity for an extra frame (0.2 sec). If you prefer the frames of animation to be equal and have no pauses, it’s as simple as deleting Frame 16, so your last frame, Frame 15 at 45% opacity which loops back to Frame 1 at 50% opacity.